Steam cleaning a couch is one of the most effective ways to sanitise upholstery, reduce allergens, and refresh fabric without harsh chemicals. Steam cleaners generate temperatures near 93°C, which kills dust mites and surface bacteria on contact. The process is called hot vapour extraction in professional circles, though most people simply call it steam cleaning. Done correctly, it leaves your sofa genuinely clean rather than just surface-fresh. Done incorrectly, it can shrink fibres, cause mildew, or set stains permanently. This guide covers every step, from checking your fabric code to drying your cushions safely, so you get the result you are after.
What tools do you need for steam cleaning a couch?
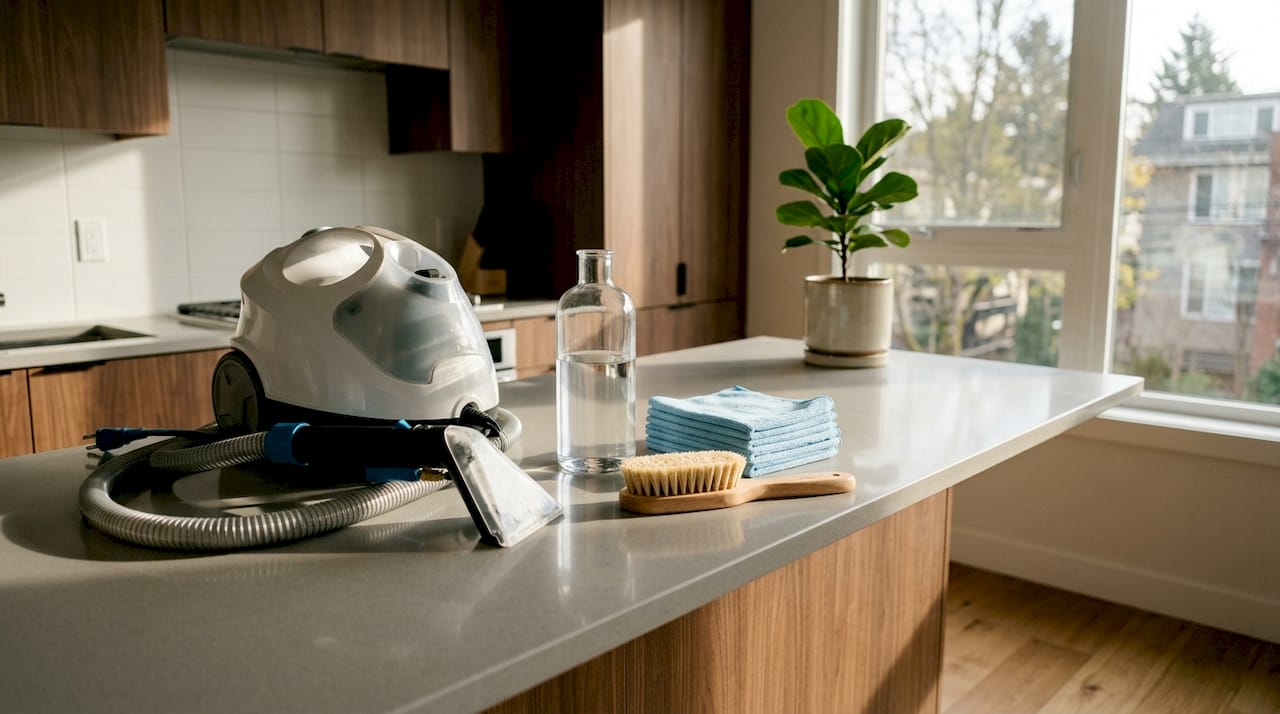
Having the right equipment before you start makes the difference between a clean sofa and a damaged one. You do not need professional-grade machinery for routine upholstery care, but you do need the correct attachments and materials.
Equipment checklist:
- Upholstery steam cleaner with a fabric-safe nozzle or brush attachment. Handheld models work well for smaller sofas; canister models suit larger sectionals.
- Distilled water to fill the steamer tank. Tap water leaves mineral deposits on fabric over time.
- Vacuum cleaner with an upholstery attachment and a crevice tool for seams and corners.
- Microfibre cloths (at least three to four). You will use these for blotting immediately after steaming.
- Soft-bristle brush for loosening surface debris before vacuuming.
- Upholstery pre-treatment spray for any visible stains. Choose one suited to your fabric type.
- Gloves (optional but recommended if your skin is sensitive to heat).
| Item | Purpose |
|---|---|
| Upholstery steam cleaner | Delivers high-temperature vapour to sanitise fabric |
| Distilled water | Prevents mineral build-up inside the steamer and on fabric |
| Vacuum with attachments | Removes loose dirt before steam is applied |
| Microfibre cloths | Blots moisture immediately after steaming to prevent water rings |
| Pre-treatment spray | Breaks down set-in stains before steaming begins |
Pro Tip: Fill your steamer with distilled water every single time, even if your tap water is soft. Mineral residue builds up gradually and can leave a white haze on dark upholstery after several cleaning sessions.
How to prepare your couch before steam cleaning
Preparation is where most DIY attempts go wrong. Skipping even one of these steps can result in fabric damage or a sofa that looks worse after cleaning than before.
- Check the upholstery cleaning code. Look under the cushions or on the sofa’s care label. Cleaning codes W or WS are safe for steam; codes S or X are not. S means solvent-only cleaning; X means vacuum only. Applying steam to an S or X coded fabric causes irreversible damage.
- Perform a colourfastness spot test. Choose a hidden area, such as the back panel or the underside of a cushion. Apply a small burst of steam and blot immediately. Wait five minutes and check for colour transfer, shrinkage, or texture change. Some synthetic upholstery fabrics are sensitive to heat, so this step is non-negotiable regardless of the care code.
- Vacuum the entire sofa thoroughly. Use the upholstery attachment across all flat surfaces, then switch to the crevice tool for seams, piping, and the gap between cushions and the frame. Routine vacuuming prevents dirt from forming a muddy paste when steam is applied. If you skip this, the steam will push loose debris deeper into the fabric.
- Remove all cushions. Clean the cushions separately and vacuum underneath them. Dirt and crumbs accumulate on the base platform and will contaminate freshly cleaned cushions if left in place.
- Pre-treat visible stains. Apply your chosen upholstery pre-treatment spray to any stained areas and allow it to dwell for the time stated on the product label. Steam cleaning alone cannot lift set-in stains and may actually set them permanently if no pre-treatment is used.
- Ventilate the room. Open windows and, if possible, position a fan near the sofa. Good airflow is critical for drying after cleaning and prevents moisture from sitting in the fabric.
Step-by-step guide to steam cleaning your sofa safely
Follow these steps in order. Rushing or skipping ahead is the most common cause of over-saturated fabric and mildew.
- Fill the steamer with distilled water and allow it to heat fully before you begin. Most models indicate readiness with a light or an audible signal. Starting before the unit is fully heated produces wet, low-temperature vapour that saturates fabric without sanitising it.
- Select a low to medium steam setting. High settings deliver too much moisture for most upholstery fabrics. Start low and increase only if the fabric responds well during your spot test area.
- Work in small sections of roughly one to two square feet. Moving section by section prevents you from over-saturating any one area and keeps the process methodical.
- Hold the nozzle 0.5 to 1 inch from the fabric surface. Limit steam exposure to 2–3 seconds per section and keep the nozzle moving in overlapping strokes. Holding the nozzle still or too close concentrates moisture and creates conditions for mildew inside the cushion fill.
- Blot immediately with a dry microfibre cloth. Post-steam blotting is essential to absorb moisture and lift loosened dirt from the surface. Press firmly but do not rub. Rubbing spreads the dirt and can damage the fabric pile.
- Move to the next section and repeat. Work across the sofa in a consistent pattern, such as left to right, top to bottom, so you do not miss any area or double-steam a section accidentally.
- Steam the cushions separately. Treat each face of each cushion individually, blotting after each section. Pay particular attention to seams and piping where dirt concentrates.
Pro Tip: If a stain is still visible after one pass, allow the fabric to dry completely before attempting a second treatment. Applying more steam to a damp area is the fastest route to mildew and water rings.
How to dry and maintain your couch after steaming
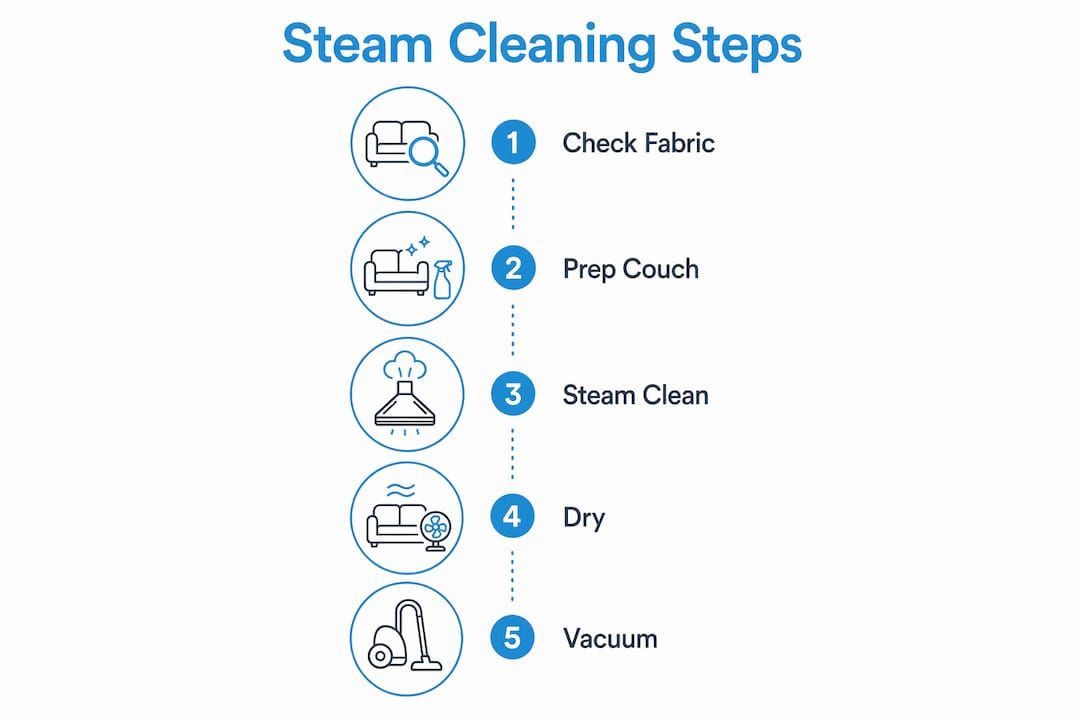
Drying is not optional. A sofa that feels dry to the touch can still hold moisture deep in the cushion fill, and that moisture causes mildew if the room is not properly ventilated.
Post-cleaning drying steps:
- Position at least one fan directed at the sofa immediately after cleaning.
- Open all nearby windows to create cross-ventilation.
- Remove cushion covers if they are removable and allow them to dry flat or draped over a clothes airer.
- Expect a drying time of 4–8 hours depending on fabric thickness, cushion density, and the humidity level in your home. On a damp Kildare day in autumn or winter, lean towards the longer end of that range.
- Do not sit on the sofa until it is fully dry. Body weight compresses damp cushions and traps moisture inside.
Signs of incomplete drying or damage to watch for:
- A musty or sour smell developing within 24 hours indicates moisture trapped inside the cushion fill.
- White water rings on the fabric surface mean the moisture was not blotted quickly enough or the steam setting was too high.
- Pilling or texture change on synthetic fabrics suggests the heat was too intense for that material.
If you detect a musty smell within 24 hours of cleaning, remove the cushion covers immediately, sprinkle baking soda generously over the fill, leave it for several hours, then vacuum it away. Repeat ventilation with a fan until the smell clears. If the smell persists beyond 48 hours, the cushion fill may need professional attention.
Ongoing maintenance schedule:
Vacuum your sofa at least once a month. In homes with pets or where eating on the sofa is common, vacuum weekly. A semi-annual steam clean keeps allergen levels low and prevents heavy soiling from building up. For general upholstery care best practices, consistent light maintenance is always more effective than infrequent deep cleans.
Key takeaways
Steam cleaning a sofa sanitises upholstery effectively, but only when the fabric code is correct, the technique is controlled, and drying is thorough.
| Point | Details |
|---|---|
| Check the fabric code first | Only W and WS coded upholstery is safe for steam; S and X codes will be damaged. |
| Always pre-treat stains | Steam alone sets stains permanently; use a pre-treatment spray before steaming. |
| Control steam exposure | Hold the nozzle 0.5–1 inch from fabric and limit each section to 2–3 seconds. |
| Blot immediately after steaming | A dry microfibre cloth absorbs moisture and prevents water rings and residue. |
| Allow 4–8 hours to dry fully | Use fans and open windows; do not sit on the sofa until it is completely dry. |
My honest view on DIY steam cleaning versus professional care
I have seen a lot of sofas after well-intentioned DIY steam cleaning sessions, and the most common mistake is not technique. It is overconfidence about the fabric. Homeowners assume that because a sofa looks like a standard fabric couch, it will respond like one. Velvet, chenille, and certain woven synthetics behave very differently under heat and moisture, even when the care label says W.
DIY steam cleaning is genuinely effective for routine sanitisation, allergen reduction, and freshening up a sofa that gets regular use. Households with children, pets, or anyone with dust mite allergies benefit significantly from a semi-annual steam clean. The process is low-chemical and thorough when done correctly.
The limitation is stain removal and delicate fabrics. Professional cleaning is recommended for heavily soiled upholstery and for any fabric coded S, because the risk of permanent damage from DIY attempts is real. I would also always recommend professional care for unfinished leather, antique upholstery, or any piece with sentimental or financial value. The cost of a professional clean is always less than the cost of replacing a sofa you damaged trying to save money.
Follow the manufacturer’s care guidelines without exception. Test before you commit. And if you are in any doubt about your fabric type, call a professional before you apply heat and moisture to something you cannot replace.
— Constantin
Professional upholstery cleaning from Topcleaners
Some sofas need more than a DIY steam session. Heavily soiled upholstery, delicate fabrics, or pieces that have not been cleaned in years benefit from professional-grade equipment and specialist solutions that go well beyond what a domestic steamer can achieve.

Topcleaners provides expert upholstery cleaning tailored to your specific fabric type, with transparent pricing and no hidden fees. Whether you need a one-off deep clean or regular maintenance, the team brings professional equipment and genuine care to every job. For homeowners across County Kildare who want results without the risk, professional cleaning services from Topcleaners are a straightforward, reliable option. Book online without a contract and get your sofa back to its best.
FAQ
Is steam cleaning safe for all couch fabrics?
Steam cleaning is safe only for upholstery labelled with cleaning codes W or WS. Fabrics coded S or X will be damaged by moisture and heat.
How long does a steam-cleaned couch take to dry?
A properly steam-cleaned couch takes 4–8 hours to dry fully. Using fans and open windows reduces that time and prevents mildew.
Can steam cleaning remove stains from a sofa?
Steam cleaning sanitises and refreshes fabric but does not remove set-in stains on its own. Pre-treat stains with an appropriate upholstery cleaner before steaming.
How often should I steam clean my sofa?
A semi-annual steam clean is recommended for most households. Homes with pets or allergy sufferers benefit from more frequent cleaning, supported by monthly vacuuming.
Do I need distilled water in my steam cleaner?
Distilled water prevents mineral deposits from building up inside the steamer tank and on your fabric. Tap water works in the short term but leaves residue over repeated use.